


Changing the oil in your BMW is an essential maintenance task that can significantly enhance the longevity and performance of your vehicle. Regular oil changes help remove harmful contaminants and ensure that your engine runs smoothly. This DIY oil change guide is tailored for home mechanics who want to tackle this task with confidence and precision.
Whether you’re a seasoned DIY enthusiast or a beginner looking to learn, our step-by-step guide provides clear instructions to help you successfully perform an oil change on your BMW. With the right tools and a bit of patience, you can save money and gain a better understanding of your car’s mechanics.
In this article, we will cover everything from selecting the appropriate oil to the necessary tools and detailed instructions for each stage of the process. Emphasizing safety and efficiency, our guide will ensure that you feel equipped to take on this important maintenance task. Let’s dive into the details and get your BMW running optimally!
Choosing the Right Oil and Tools for Your BMW Oil Change
When planning a diy oil change for your BMW, selecting the appropriate oil is paramount. BMW typically recommends synthetic oil, which enhances engine performance and longevity. Always check your owner’s manual for the specific oil viscosity and specifications that suit your model. Generally, a 5W-30 or 0W-40 oil is favored for most BMW engines.
The quality of the oil you choose is crucial. Opt for brands that meet BMW Longlife specifications, such as BMW Longlife 01 or Longlife 14, to ensure your engine remains protected. High-quality oils contain additives that prevent sludge buildup and reduce engine wear.
In addition to the right oil, having the right tools is essential for a successful oil change. Basic tools include a oil filter wrench, socket set, and a drain pan to collect used oil. An oil funnel is also helpful for pouring new oil without spillage. Consider using a torque wrench to tighten the oil drain plug and filter to the manufacturer’s specifications, preventing leaks.
Investing in a used oil disposal container is a responsible choice, allowing for proper disposal of used oil. Always adhere to local regulations for disposing of oil and filters, as environmental concerns are significant in automotive maintenance.
Equipped with the right oil and tools, you can confidently execute an effective oil change, ensuring your BMW runs smoothly for miles to come.
Step-by-Step Process to Drain Old Oil and Replace Oil Filter
Before starting the oil change on your BMW, gather the necessary tools: an oil catch pan, a wrench set, an oil filter wrench, and a funnel. Make sure you have the correct type and amount of oil recommended for your specific BMW model.
1. Prepare the Vehicle: Park the BMW on a level surface and turn off the engine. Allow the engine to cool completely. Engage the parking brake for safety.
2. Locate the Oil Drain Plug: Underneath the car, locate the oil drain plug. It’s usually positioned at the bottom of the oil pan, near the engine.
3. Position the Oil Catch Pan: Place the oil catch pan beneath the oil drain plug. This will collect the old oil as it drains out.
4. Remove the Drain Plug: Using the appropriate wrench, carefully loosen and remove the oil drain plug. Expect old oil to flow out. Let it drain completely into the catch pan.
5. Replace the Oil Drain Plug: Once all the oil has drained, clean the drain plug with a cloth and inspect the gasket. If necessary, replace the gasket. Reinstall the drain plug and tighten it securely.
6. Locate the Oil Filter: Now, find the oil filter, which is generally located on the side of the engine. It may require maneuvering around some components to access it.
7. Remove the Old Oil Filter: Using an oil filter wrench, turn counterclockwise to remove the old oil filter. Be cautious, as some oil may still be trapped in the filter.
8. Prepare the New Oil Filter: Before installing the new filter, apply a small amount of new oil to the rubber gasket of the new oil filter. This helps ensure a good seal and makes it easier to remove during the next oil change.
9. Install the New Oil Filter: Screw the new oil filter onto the engine by turning it clockwise until snug. Avoid overtightening it, as this can cause damage.
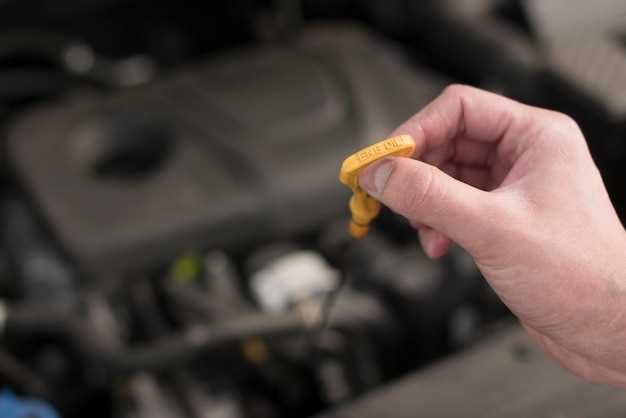
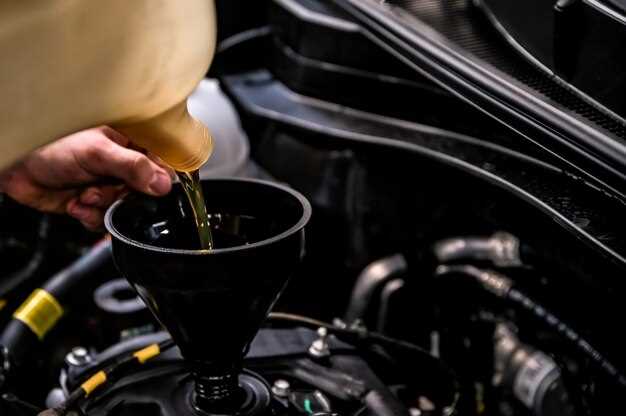
10. Add New Oil: Remove the oil filler cap on top of the engine. Using a funnel, pour in the recommended amount of new oil. Check the oil level with the dipstick and adjust as necessary.
11. Check for Leaks: Start the engine and let it run for a few minutes. Check underneath for any leaks from the drain plug or oil filter. If there are none, proceed to replace the oil filler cap.
12. Dispose of Old Oil and Filter: Properly dispose of the old oil and oil filter at a recycling center or automotive shop equipped to handle hazardous materials.
Properly Filling New Oil and Checking for Leaks
After completing your BMW oil change, it is crucial to fill the engine with fresh oil correctly. Start by selecting the appropriate type and grade of oil for your BMW model as specified in the owner’s manual. Once you have the right oil, proceed to remove the oil filler cap located on the top of the engine.
Using a funnel, carefully pour the new oil into the engine. It is advisable to add oil in gradual amounts, typically around half of the total capacity first. This ensures a precise fill and helps avoid spills. After pouring, allow the oil to settle for a few moments before checking the oil level.
Utilize the dipstick to check the oil level. Remove the dipstick, wipe it clean with a lint-free cloth, and reinsert it completely before pulling it out again. The oil level should be within the designated marks on the dipstick. If it is low, continue to add oil in small increments, checking frequently until the desired level is reached.
Once the oil is filled properly, it’s essential to check for any leaks. Start the engine and allow it to run for a few minutes. Observe the area under the vehicle for any signs of oil dripping. Any leaks may indicate a loose oil filter or drain plug that needs attention. Turn off the engine, and if you notice any leaks, address them immediately to prevent potential damage to your BMW.
Regularly checking for leaks after an oil change is an important step in vehicle maintenance. It not only ensures that your oil change is successful but also contributes to the overall longevity of your engine. By following these steps carefully, you can keep your BMW running smoothly with the right oil in place.

