


Dealing with bumper damage can be a frustrating experience for any BMW owner. Whether it’s a minor scratch or a more serious dent, estimating repair costs at a bodywork shop may not always be ideal. Fortunately, with a bit of patience and the right tools, you can tackle the repair yourself and save both time and money.
In this guide, we will cover the essential steps to repair your BMW bumper, focusing on methods that cater to various levels of damage. From understanding the type of damage to choosing the appropriate repair materials, we aim to provide a comprehensive overview that empowers you to restore your vehicle’s bumper to its original condition.
Repairing your bumper is not just about fixing the aesthetics; it’s also about maintaining the value of your BMW. A well-executed bumper repair can ensure the longevity of your vehicle’s bodywork and prevent further complications down the line. By following our step-by-step guide, you will gain the confidence to give your bumper the care it needs without the hassle of a professional bodywork shop.
Assessing the Extent of Damage to Your BMW Bumper
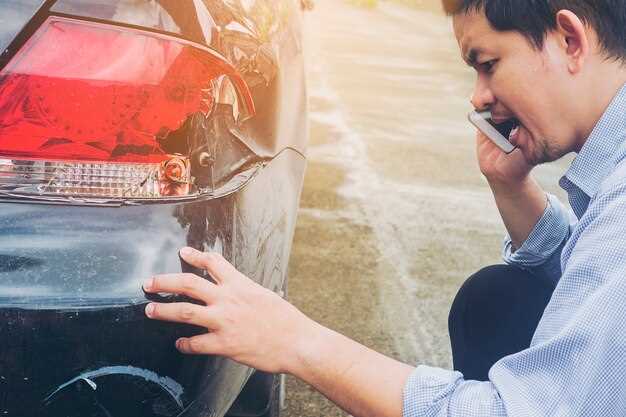
Before embarking on any repair journey for your BMW bumper, it is crucial to accurately assess the extent of the damage. Start by visually inspecting the bumper for any noticeable scratches, dents, or cracks. Look closely for any signs of structural deformation, which can indicate more severe impact.
Take note of the materials used in your BMW’s bodywork. Different materials, such as plastic, fiberglass, or metal, can affect the repair process. Plastic bumpers might only require surface-level fixes, while metal components could necessitate more intricate bodywork.
Determine if the damage is purely cosmetic or if it affects the bumper’s functionality. Check for any misalignment with the surrounding body panels; this may require adjustments alongside cosmetic repairs. Additionally, if there are any internal components involved, such as sensors or wiring, ensure they have not been affected by the impact.
Make a list of all observed damages, categorizing them by severity. Minor scratches may require only polishing, while larger dents might need filler and painting. If you find cracks, assess whether they are superficial or if they compromise the bumper’s integrity and require replacement.
After your assessment, consider your skill level and the tools at your disposal. Some repairs can be managed at home, while others may require professional help. Consult online guides specific to BMW models for further insight on tackling various types of damage, especially if you encounter issues that surpass your capability.
Tools and Materials Needed for BMW Bumper Repair
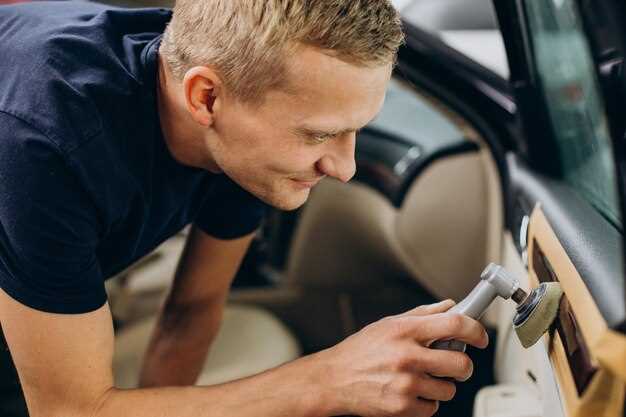
Repairing a damaged BMW bumper requires specific tools and materials to ensure a high-quality finish and restore your vehicle to its original state. Below is a detailed list of what you’ll need for effective bodywork and bumper repairs.
1. Basic Tools: A complete set of hand tools including wrenches, pliers, and screwdrivers is essential. These will help you remove and reinstall the bumper without damaging any components.
2. Power Tools: An electric or pneumatic sander is necessary for smoothing out any rough edges or areas where the paint may have chipped away. Additionally, a heat gun can assist in reshaping plastic bumpers.
3. Sandpaper: Various grits of sandpaper (ranging from 80 to 2000) are important for preparing the surface of the bumper for painting. Coarser grits will be used for initial sanding, while finer grits will provide a smooth finish.
4. Filler Material: Use a high-quality automotive body filler for repairing dents and scratches. This material is designed to adhere to plastic and metal surfaces and can be sanded down to create a seamless finish.
5. Primer and Paint: A good primer is vital to prepare the bumper surface before painting. Choose an automotive-grade paint that matches your BMW’s color code for the final touch.
6. Clear Coat: Applying a clear coat after painting will protect the bumper from UV damage and give it a gloss finish that matches the rest of your vehicle.
7. Protective Gear: Always wear gloves, goggles, and a mask during the repair process to protect yourself from dust, fumes, and debris generated during bodywork.
8. Cleaning Supplies: Use automotive-specific cleaners and degreasers to ensure that the surfaces are free from dirt and oil before starting the repair process. This helps the filler and paint adhere better.
By gathering these tools and materials, you can efficiently tackle your BMW bumper repair project with confidence, achieving a professional-looking result without the need for a body shop.
Step-by-Step Process for Repairing Your BMW Bumper
Repairing your BMW bumper requires attention to detail and the right approach. Follow this step-by-step guide to effectively carry out the repair yourself.
Step 1: Assess the Damage – Start by examining the bumper thoroughly. Look for cracks, dents, or paint damage. Determine if the damage can be repaired or if a full replacement is necessary.
Step 2: Gather Necessary Tools and Materials – Collect all the tools and materials required for the repair. You will need sandpaper, a cleaner, a primer, paint, and clear coat. Have a heat gun handy for flexibility in plastic and a repair kit for deep scratches.
Step 3: Prepare the Surface – Clean the damaged area with a suitable cleaner to remove dirt and grease. Once clean, sand the area around the damage using sandpaper to promote better adhesion of materials.
Step 4: Repair Minor Dents and Scratches – For small dents, use a heat gun to soften the plastic, then push the dent from behind or use a suction tool. Fill any scratches with the filler from your repair kit and smoothen it out. Allow it to cure according to the instructions provided.
Step 5: Prime the Area – Once the filler is dry, sand it smooth and apply a coat of primer. This step is crucial as it helps the paint stick better and ensures a more professional finish. Allow the primer to dry completely before moving on.
Step 6: Paint Application – Choose a paint that matches your BMW’s color code. Apply thin coats, allowing each to dry thoroughly before applying the next. This will prevent drips and ensure an even color. After achieving the desired color depth, allow the paint to cure.
Step 7: Finish with Clear Coat – After the paint has dried, apply a layer of clear coat to protect the paint and give it a glossy finish. Be sure to follow the manufacturer’s instructions for drying times.
Step 8: Final Inspection – Once everything is dry, inspect the repair. Ensure that the finish is smooth and even. If there are any imperfections, consider sanding and adding more paint or clear coat as needed.
By following these steps carefully, you can successfully repair your BMW bumper, restoring its appearance and ensuring the integrity of your vehicle’s bodywork.
