


Ball joints are a crucial component of your BMW’s suspension system, connecting the control arms to the steering knuckles. Over time, these joints can wear out due to exposure to various road conditions and driving styles, leading to compromised vehicle performance and safety. Understanding how to safely replace BMW ball joints is essential for maintaining the integrity of your suspension and ensuring a smooth driving experience.
In this guide, we will walk you through the step-by-step process to replace ball joints on your BMW. Properly handling this task not only saves you money but also allows you to gain a deeper appreciation for your vehicle’s suspension system. We will provide you with detailed instructions, essential tools, and safety tips to ensure that you can perform this repair confidently and correctly.
Equipped with the right knowledge, tools, and precautions, you will be able to tackle the replacement of ball joints with ease. This guide aims to help BMW owners preserve the longevity of their vehicles while enhancing their skills in automotive maintenance. Let’s delve into the steps required to effectively replace the ball joints and keep your BMW’s suspension in peak condition.
Identifying Symptoms of Worn Ball Joints in BMW Vehicles
Worn ball joints can lead to significant issues in BMW vehicles, affecting both safety and handling. Recognizing the symptoms early can prevent costly repairs and ensure a smooth driving experience.
One of the first signs of worn ball joints is the presence of a clunking or popping noise when driving over bumps or making sharp turns. This sound indicates that the joints are losing their integrity and may not be providing adequate support.
Another common symptom is uneven tire wear. If you notice excessive wear on one side of the tire, it may be due to failing ball joints causing misalignment. Regular tire rotation can help identify this issue early.
Steering problems, such as looseness or vague steering response, may also indicate worn ball joints. A compromised joint can lead to instability, making it difficult to control the vehicle accurately.
Additionally, if you experience vibrations in the steering wheel while driving, this could be a sign of deteriorating ball joints. This vibration typically occurs at higher speeds and indicates that the suspension system is not functioning correctly.
Performing a visual inspection can also help identify issues. Look for signs of wear, such as torn rubber boots or excess grease leakage. Any visible damage could suggest that the ball joints are failing and need to be replaced.
Being attentive to these symptoms will help you address any concerns regarding ball joints promptly and maintain the performance of your BMW vehicle.
Step-by-Step Guide to Removing Old Ball Joints
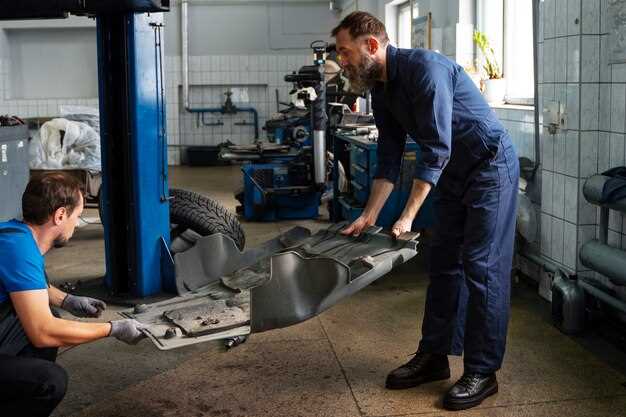
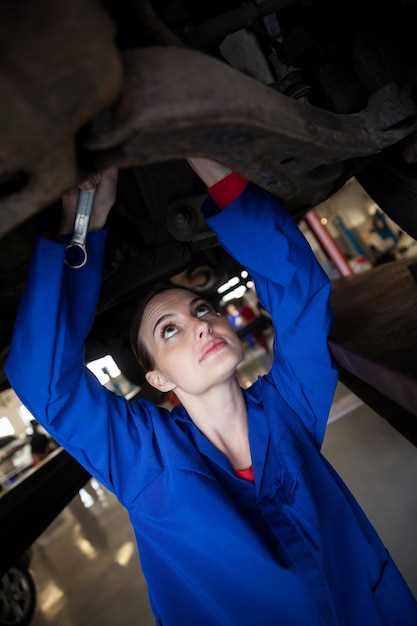
Removing old ball joints from your BMW’s suspension system requires careful attention to detail and the right tools. Follow these steps to safely extract the ball joints from your vehicle.
1. Gather Tools and Safety Equipment
Before starting the removal process, ensure you have the necessary tools: a ball joint separator, socket wrenches, a hammer, and a torque wrench. Additionally, wear safety glasses and gloves to protect yourself while working.
2. Lift the Vehicle
Using a jack, lift the front of your BMW and secure it with jack stands. This will give you sufficient access to the suspension components.
3. Remove the Wheel
Take off the wheel where the ball joint is located. This may require loosening the lug nuts with a socket wrench before lifting the wheel off.
4. Locate the Ball Joint
Identify the old ball joint in the suspension assembly. Usually, it is connected to the control arm and knuckle.
5. Disconnect the Ball Joint
Use a socket wrench to remove the bolts securing the ball joint to the control arm. If you encounter difficulty, lightly tap the bolts with a hammer to loosen them.
6. Use a Ball Joint Separator
Position the ball joint separator around the joint. Carefully apply pressure using the separator tool until the ball joint pops free from the knuckle. Ensure you do this slowly to avoid damaging surrounding components.
7. Remove Any Remaining Debris
Once the ball joint is free, inspect the area for any debris or excess grease. Clean it thoroughly to prepare for the installation of the new ball joint.
8. Inspect Related Components
Take this opportunity to inspect other suspension components for wear and tear. Check bushings, tie rods, and the control arm for any signs of damage that may need attention.
This step-by-step guide provides a clear method for safely removing old ball joints from your BMW’s suspension system. Following these steps will help ensure a successful replacement and maintain your vehicle’s performance.
Proper Installation Techniques for New Ball Joints in BMW Suspension
Replacing ball joints is a critical task in maintaining the integrity of the BMW suspension system. Proper installation ensures safe handling, prolongs the lifespan of the parts, and contributes to overall vehicle performance.
First, always start with clean tools and ensure your workspace is organized. Before removing the old ball joints, it’s essential to inspect the suspension components for any signs of wear or damage. This initial evaluation can prevent further issues after installation.
When removing old joints, use a proper ball joint remover tool to avoid damaging the control arms. This tool provides the necessary leverage to separate the joint without damaging surrounding components. Be gentle yet firm, as excessive force can cause irreparable harm to the suspension.
Before installing new joints, clean the mounting surfaces thoroughly. Ensure there is no dirt, grease, or old adhesive left on the control arms, as this can interfere with the seating of the new joints. After cleaning, inspect the new ball joints for any visible defects or damage before installation.
During installation, apply a light coat of grease to the mating surfaces. This helps form a secure connection and facilitates easier future maintenance. Line up the new joints carefully to ensure proper alignment within the suspension system.
Once positioned, use the appropriate tools to press the new ball joints into place, following the manufacturer’s specifications for torque settings. This step is crucial; excessive torque can damage the joint, while insufficient torque can lead to premature failure.
After securing the new joints, reassemble any components you removed during the process. Ensure every bolt is tightened to the specified torque, checking twice for compliance with BMW’s specifications.
Finally, perform a thorough inspection of the suspension system post-installation. Check for any unusual noises or movements during a test drive, and ensure the vehicle is aligned properly. This step will help mitigate any long-term issues associated with improper installation.

