


When it comes to vehicle maintenance, ensuring that your BMW’s headlights are in optimal condition is crucial for safe driving. The performance of your car’s lighting system plays a significant role, not just in visibility but also in the overall aesthetics of your vehicle. Whether it’s due to wear and tear or an unfortunate encounter with a road hazard, replacing the headlights can seem daunting but is entirely manageable with the right guidance.
This comprehensive guide will walk you through the process of replacing your BMW’s headlights step by step. Understanding the specific requirements for your model, along with the tools needed, will empower you to tackle this task with confidence. You will not only save money by avoiding a costly trip to the dealership but also gain a sense of accomplishment by taking the initiative in your vehicle’s upkeep.
Let’s explore the different types of headlights available for BMW models, the signs indicating when replacement is necessary, and the precise steps to ensure that your new lighting components are installed correctly for maximum efficiency and safety.
Choosing the Right Headlight Bulbs for Your BMW Model
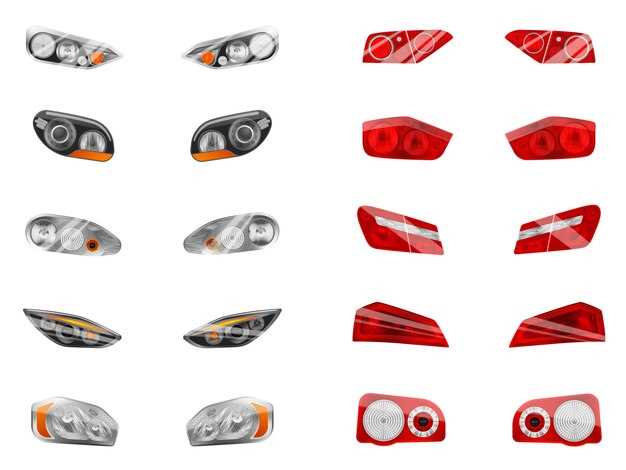
Selecting the appropriate headlight bulbs for your BMW is essential for optimal lighting performance and safety. Different BMW models come equipped with various types of headlight systems, such as halogen, HID (High-Intensity Discharge), or LED lighting. Understanding the specific requirements of your model will ensure you choose the right replacement bulbs.
Firstly, consult your owner’s manual to identify the correct bulb type and specifications. This guide will provide you with information about wattage, size, and the technology used in your vehicle’s headlights. Using incorrect bulbs can lead to poor visibility and may damage the headlight assembly.
For halogen headlights, consider upgrading to high-performance options that deliver brighter and whiter light, improving nighttime driving visibility. If your BMW uses HID lights, ensure you buy bulbs that match the color temperature specified for your model to maintain consistent lighting quality.
LED headlights are becoming increasingly popular due to their longevity and efficiency. If your BMW is compatible with LED technology, it’s worth investing in these options as they provide superior lighting compared to traditional halogen bulbs, while consuming less power.
Finally, consider reputable brands known for their quality automotive lighting. Proper installation is crucial, so refer to step-by-step guides or seek professional assistance if you’re unsure about replacing the headlights yourself. Making the right choice in headlight bulbs significantly enhances your BMW’s lighting performance and overall safety on the road.
Step-by-Step Instructions for Removing Old Headlights
Before starting the removal process, ensure the vehicle is parked on a flat surface, and the engine is turned off. Always wear safety gloves and glasses for protection.
1. Open the hood of your BMW to gain access to the headlight assembly. Locate the headlights which are usually at the front corners of the engine compartment.
2. Disconnect the battery by removing the negative terminal. This step is crucial to prevent any electrical short circuits while handling the lighting components.
3. Identify the headlight securing clips or screws. Depending on the BMW model, these may vary. Typically, you will need a screwdriver or socket wrench to remove them. Carefully unscrew or unclamp these fasteners.
4. Once the fasteners are removed, gently pull the headlight assembly forward. Be cautious not to apply excessive force as this could damage the surrounding parts.
5. Disconnect the wiring harness attached to the back of the headlight. Press the release tab on the connector and pull it away from the headlight. Ensure that you do not yank the wires to avoid any damages.
6. Remove the headlight bulb from the assembly if it’s not already integrated into the new unit. For some models, you may need to twist or pull the bulb to release it.
7. Inspect the headlight assembly for any broken clips or damage. If everything looks good, you are now ready to install the new headlights.
Installing New Headlights and Testing for Proper Functionality
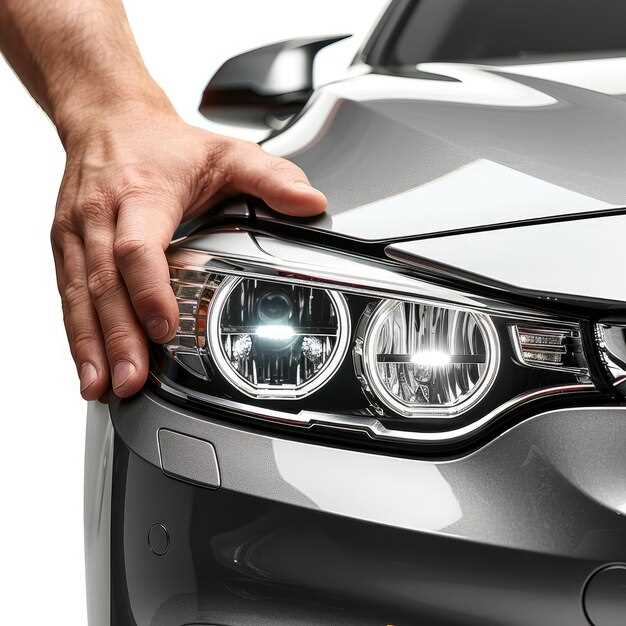
Begin by carefully positioning the new headlights into the housing. Align the mounting tabs with the designated slots to ensure a secure fit. Once aligned, gently press the headlights until they are firmly in place. For added stability, fasten any retaining clips or screws that may have been removed during the disassembly process.
Next, reconnect the electrical connectors. Ensure that the connectors click into place securely, as a loose connection can result in malfunctioning lighting. It is advisable to check the orientation of the connectors to avoid any damage to the pins.
Once the new headlights are installed and connected, proceed to test their functionality. Start the vehicle and switch on the headlights. Inspect both low and high beam settings, confirming that each functions as expected. Additionally, verify any auxiliary lighting such as turn signals or fog lights, ensuring they illuminate properly.
If any issues are detected, double-check the electrical connections for any loose or damaged wires. It may also be necessary to consult a wiring diagram for troubleshooting potential problems. Making sure the headlights operate correctly is crucial for safety and visibility on the road.
Finally, after confirming that all lighting is functioning properly, secure any remaining parts of the headlight assembly, and perform a final visual inspection to ensure everything is in order. Your BMW’s new headlights should now provide the clarity and performance needed for safe driving.

