


Maintaining the luxurious feel of your BMW’s interior is essential for enhancing your driving experience. Over time, interior trim pieces may become worn, damaged, or outdated, necessitating their replacement. Understanding the process of replacing these components is crucial to ensure that your BMW not only looks its best but also retains its value.
In this guide, we will provide you with step-by-step instructions on how to effectively replace BMW interior trim pieces. We will cover the necessary tools, materials required for the job, and tips for a seamless replacement process. Whether you’re looking to refresh the look of your dashboard, center console, or door trims, our comprehensive guide will help you achieve professional results.
Replacing your BMW’s interior trim is not just about aesthetics. It can also improve functionality and create a more enjoyable driving environment. With the proper knowledge, you can transform your vehicle’s interior, making it a reflection of your personal style while retaining the high standards synonymous with the BMW brand. Get ready to dive into the world of interior replacements and elevate your BMW experience.
Identifying the Right Trim Pieces for Your BMW Model
When it comes to replacing interior trim pieces in your BMW, ensuring that you select the correct components is crucial for a seamless fit and finish. Each BMW model may have unique specifications regarding trim sizes, materials, and designs. Therefore, the first step is to identify your specific BMW model and its production year, as variations can occur even within the same series.
Next, consult the owner’s manual or official BMW resources to find detailed information about the interior trim options available for your model. This will provide insights into different color schemes, materials used, and specific part numbers necessary for a successful replacement. Typically, BMW trims come in various materials such as wood, aluminum, and high-quality plastics, each tailored to fit specific aesthetic and functional requirements.
Online forums and BMW enthusiast communities are also invaluable resources. Many users share their experiences, including compatibility issues and recommendations on sourcing genuine or aftermarket parts. Pay attention to feedback regarding the quality and fit of replacement trims, as this can save you time and effort in the long run.
Additionally, if you’re considering customizations, ensure that the selected trim pieces match not only your model but also your personal style and preferences. Always cross-reference part numbers when purchasing from third-party vendors to avoid mismatches that could lead to improper installation and functionality in your BMW interior.
In summary, identifying the right interior trim pieces involves thorough research into your specific BMW model, consultation of manufacturer resources, and leveraging community knowledge to ensure a smooth replacement process.
Step-by-Step Process for Removing Old Trim and Installing New Pieces
Replacing the interior trim in your BMW can enhance its aesthetic appeal and make your driving experience more enjoyable. Follow this guide to ensure a smooth process.
1. Gather Necessary Tools: Before beginning, collect all required tools including a trim removal tool, a screwdriver set, and protective gloves. Having everything ready will streamline the process.
2. Disconnect the Battery: Safety first. Disconnect the negative terminal of the battery to prevent any electrical issues during the removal and installation of trim pieces.
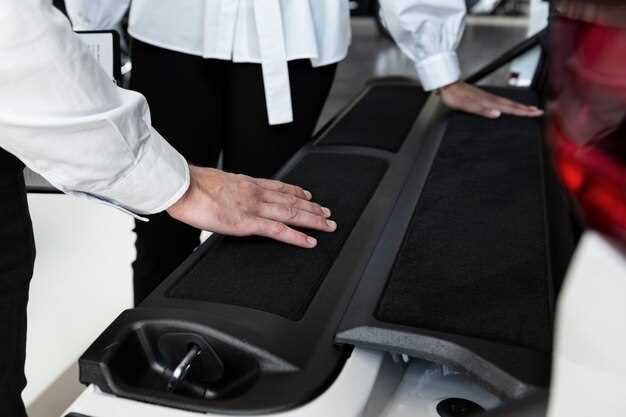
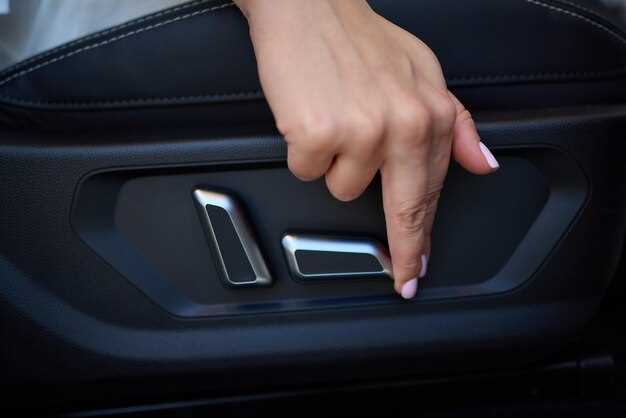
3. Identify Trim Pieces: Determine which interior trim pieces you intend to replace. Consult your vehicle’s manual for guidance on accessing these components. Common areas include the dashboard, door panels, and center console.
4. Remove Fasteners: Using the appropriate screwdriver, carefully remove any screws or fasteners holding the trim in place. Keep them in a safe location for reinstallation later.
5. Utilize Trim Removal Tool: Insert the trim removal tool into the gaps of the interior trim and gently pry it away from the surface. Take care not to damage the surrounding areas. Slowly work around the edges until the piece is fully detached.
6. Clean the Surface: Once the old trim is removed, clean the exposed surfaces thoroughly. Remove any debris, adhesive residue, or dirt to ensure a smooth installation for the new pieces.
7. Prepare New Trim: Before installation, inspect your new BMW trim pieces. Ensure they are free from defects. Compare them with the old pieces to confirm a proper fit.
8. Install New Trim: Align the new trim piece with the designated area. Press it into place, ensuring it fits snugly. Reinsert any screws or fasteners that were previously removed to secure it.
9. Reconnect the Battery: Reattach the negative terminal of the battery. This step restores power to your vehicle’s electronics.
10. Test Functionality: Finally, check the functionality of the newly installed trim pieces, especially if any electronic components are involved. Ensure everything operates as expected.
By following these steps, you can successfully remove old interior trim and install new pieces, refreshing the look of your BMW and enhancing your driving experience.
Common Tools and Materials Needed for BMW Trim Replacement
Replacing the interior trim pieces in a BMW requires specific tools and materials to ensure a smooth and effective process. Here are some essential items you will need:
1. Trim Removal Tools: These plastic or nylon tools are designed to safely pry off trim pieces without causing damage to the underlying surfaces. They help in removing clips and fasteners without scratching the interior.
2. Screwdrivers: A set of both flathead and Phillips screwdrivers is essential for loosening screws that hold the trim pieces in place. It’s advisable to have various sizes to accommodate different screw types used in BMWs.
3. Torx Bits: Many BMW trim components are secured with Torx screws. Having a Torx bit set will enable you to easily remove these screws without stripping them, ensuring a clean removal.
4. Pliers: Needle-nose pliers can be useful for gripping and pulling out stubborn clips or fasteners that may not come out easily during the replacement process.
5. Cleaning Supplies: Before installing new trim, it’s essential to clean the area thoroughly. Microfiber cloths, interior cleaners, and a soft brush can help remove dirt and debris, ensuring a perfect fit for the new pieces.
6. Replacement Trim Pieces: Ensure you have the correct replacement parts compatible with your BMW model. It’s vital to source high-quality OEM or aftermarket parts to maintain the integrity of your vehicle’s interior.
7. Adhesive or Double-Sided Tape: In some cases, trim pieces may require adhesive or tape for secure attachment. Ensure you have suitable bonding materials on hand to complete the installation without issues.
8. Instruction Manual: Always refer to your vehicle’s service manual for specific details on the removal and installation procedures for your BMW model to prevent any mistakes during the replacement.
Having these tools and materials ready will facilitate a successful BMW interior trim replacement, resulting in a refreshed and polished look for your vehicle.

